Once you have clicked on the ‘New’ button to create a new risk assessment (either Strategic or Operational), the initial risk assessment can be carried out simultaneously.
Note: Project Risks go through an extra step when creating a new risk. Please refer to Step 2 area below for more details on this.
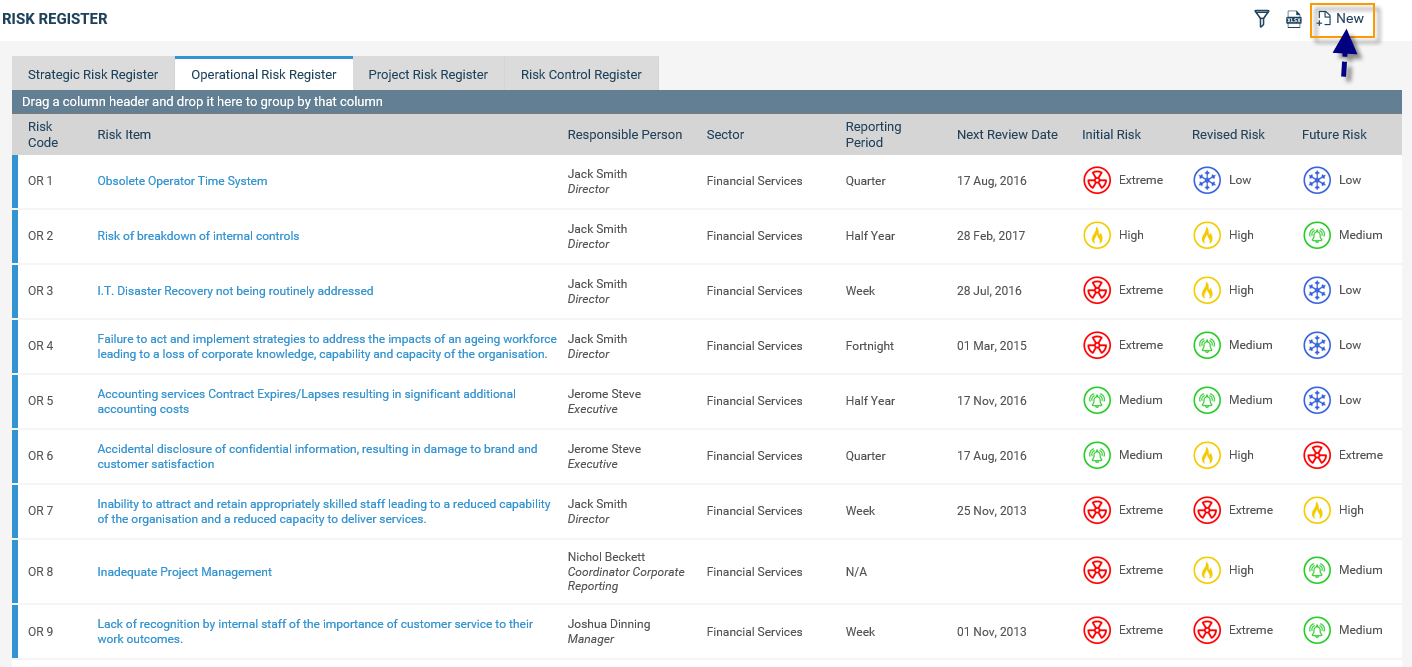
STEP 1:Select the relevant risk register tab (e.g. Strategic Risk) and click the New button at the top right hand side corner.
The screen will refresh and the new risk template will be displayed for you to start entering the details to the first Initial Risk Assessment tab.
All fields that are mandatory (as setup by your administrator) will be flagged with a red astricts.
|
|
The visibility of some fields can be controlled by the Risk Manager from Framework> Risk Settings > Field Configuration area. |
STEP 2: When creating a project risk assessment, you must select a project which the risk directly links to first. Therefore there is an extra step that is needed to be taken when creating project risks, compared to the other risk registers.
Once you have clicked on the new ![]() icon to create a new project risk, a window will pop up allowing you to firstly search for your project by using the Business Unit, Service Profile, and/or Responsible Person fields. From those filters, the Project drop down will reduce to show the projects that have been inputted from your Administration area.
icon to create a new project risk, a window will pop up allowing you to firstly search for your project by using the Business Unit, Service Profile, and/or Responsible Person fields. From those filters, the Project drop down will reduce to show the projects that have been inputted from your Administration area.
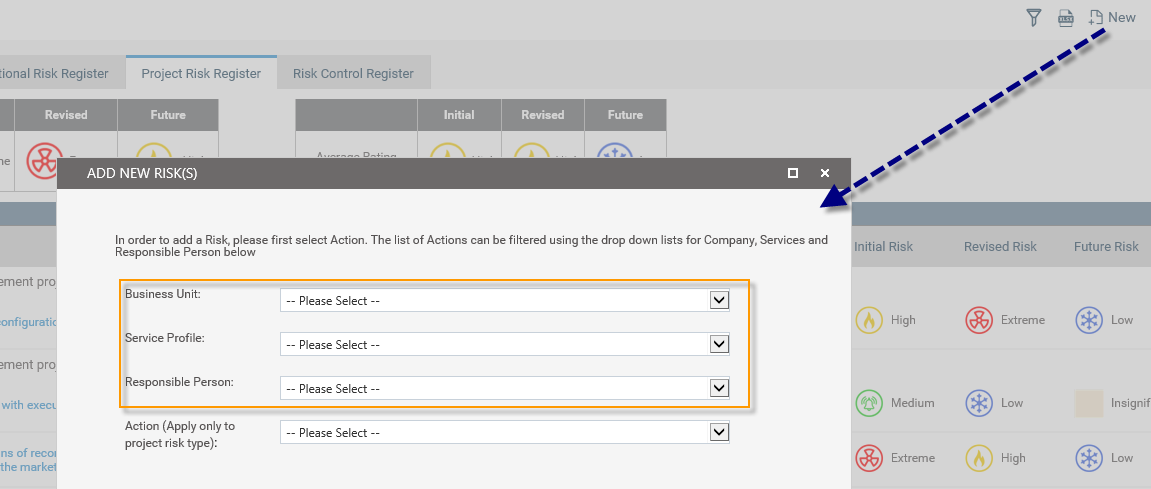
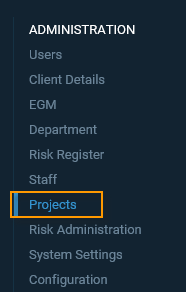
Note: For organisations that do not have interplan integration, the projects are created and filtered through this section under the Administration section of the Navigation Menu. Please refer to the Administration > Projects section for more information on creating projects if you don’t use our interplan software.
For those who do use interplan, the actions/projects will come directly from your business planning area.
Once a project has been selected, the fields will display for you to create a new project risk. Fill out the Risk title and Responsible person and then click on the add ![]() button. You may add as many risks as you like under the one project from this pop up window.
button. You may add as many risks as you like under the one project from this pop up window.

Once you have added your risks, close the window by clicking on the close icon. From here you will be taken back to the Project Risk Register, where you should now see your risks that you have just entered against your project. Click on the title (hyperlinked) to enter the risk assessment details and complete the initial risk assessment.
STEP 3: Specify the following details.
NOTE: The Risk Manager/Administrator can activate/de-active these fields or make these fields mandatory/optional from within Risk Settings. If deactivated, these fields will not show.
|
Field |
Description/Instructions |
Mandatory/Optional |
Strategic |
Operational |
Project |
|
|
|
Risk Details |
|
||||||
|
Active |
Sets the Risk as Active or Inactive. Defaults to Active. After saving however only your Risk Administrator will be able to make the risk inactive. |
N/A |
|
|
|
|
|
|
Risk Code |
Enter a code to identify the risk. NOTE: The Risk Manager can set automatic numbering for this field via Risk Settings and therefore if this is done, it will appear as greyed out. |
Mandatory |
|
|
|
|
|
|
Apply Template* |
*If Applicable Allows users to select and apply a Risk Template which auto-populates several fields within the assessment which enables speedy addition of similar risks. NOTE: Templates are defined and maintained by the Risk Manager from within the Risk Settings area. |
Optional
|
|
|
|
|
|
|
Confidential |
Tick box to define the risk as being confidential. |
Optional |
|
|
|
|
|
|
Risk Description |
Enter a short title to identify the Risk by. |
Mandatory |
|
|
|
|
|
|
Business Unit |
Assign a Business Unit for this risk. This is only applicable for Operational risks. |
Mandatory |
|
|
|
|
|
|
Service Profile |
Assign a Service Profile for this risk. This is only applicable for Operational risks. |
Optional |
|
|
|
|
|
|
Responsible Officer |
Assign a Responsible Person who will be responsible for monitoring and reporting on the status of the risk. This will enable a link to this Risk Assessment to display on the designated person’s homepage. Dropdown shows staff list for selection. |
Mandatory |
|
|
|
|
|
|
Secondary Responsible Officers |
Select a secondary Responsible Person and click ‘Add’ to add him/her to the list of Secondary Responsible Officers. Multiple staff members can be selected. Dropdown shows staff list for selection. |
Optional The Risk Manager can activate this area from within Risk Settings. If deactivated, this grid will not show. |
|
|
|
|
|
|
Risk Category
|
Select multiple Risk Categories as appropriate. Allows users to select one Category as Primary and multiple other Categories as Secondary. Also allows multiple sub categories for selection (if available) based on the Category selected as Primary. NOTE: Categories are defined by Risk Manager within Risk Settings. |
Mandatory
Secondary Category: Optional Sub Category: Optional |
|
|
|
|
|
|
Causes
|
Any Causes that contribute to this risk can be noted here. Risk Manager can toggle the visibility of this field to make it appear in Initial, Current and/or Future Risk Assessments via Risk settings.
|
The Risk Manager can decide if this field is mandatory or optional based on the configurations in the Field Configuration area.
|
|
|
|
|
|
|
Consequences
|
Any Impact/Consequences that arise from this risk can be noted here. Risk Manager can toggle the visibility of this field to make it appear in Initial, Current and/or Future Risk Assessments via Risk Settings |
|
|
|
|
||
|
Initial Assessment |
|
||||||
|
Consequences |
Select a consequence rating by clicking the ‘Select’ button. This will allow a pop up window to show for you to select the consequences based on the category description. This is called the consequence table to help you identify ‘consequence of the risk’. Users can simply click the relevant cell to select a consequence. This grid is defined and maintained by the Risk Manager from within Risk Settings. |
Mandatory
|
|
|
|
|
|
|
Likelihood |
Select a Likelihood by clicking on the ‘select’ button. This will allow a pop up window to show allowing you to select a likelihood based on a description to help you identify it. NOTE: The Likelihood list is defined by the Risk Manager within Risk Settings. Users can simply click the relevant cell to select a Likelihood. This grid is defined and maintained by the Risk Manager from within Risk Settings. |
Mandatory
|
|
|
|
|
|
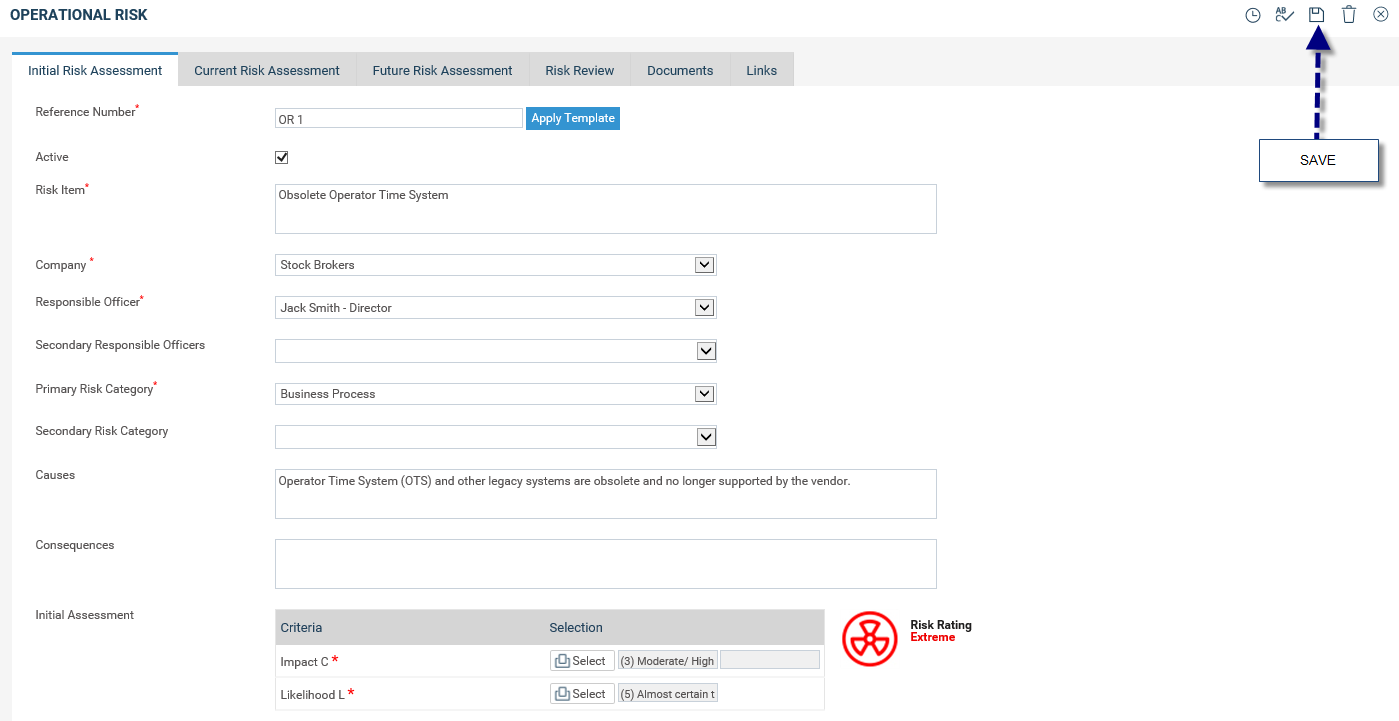
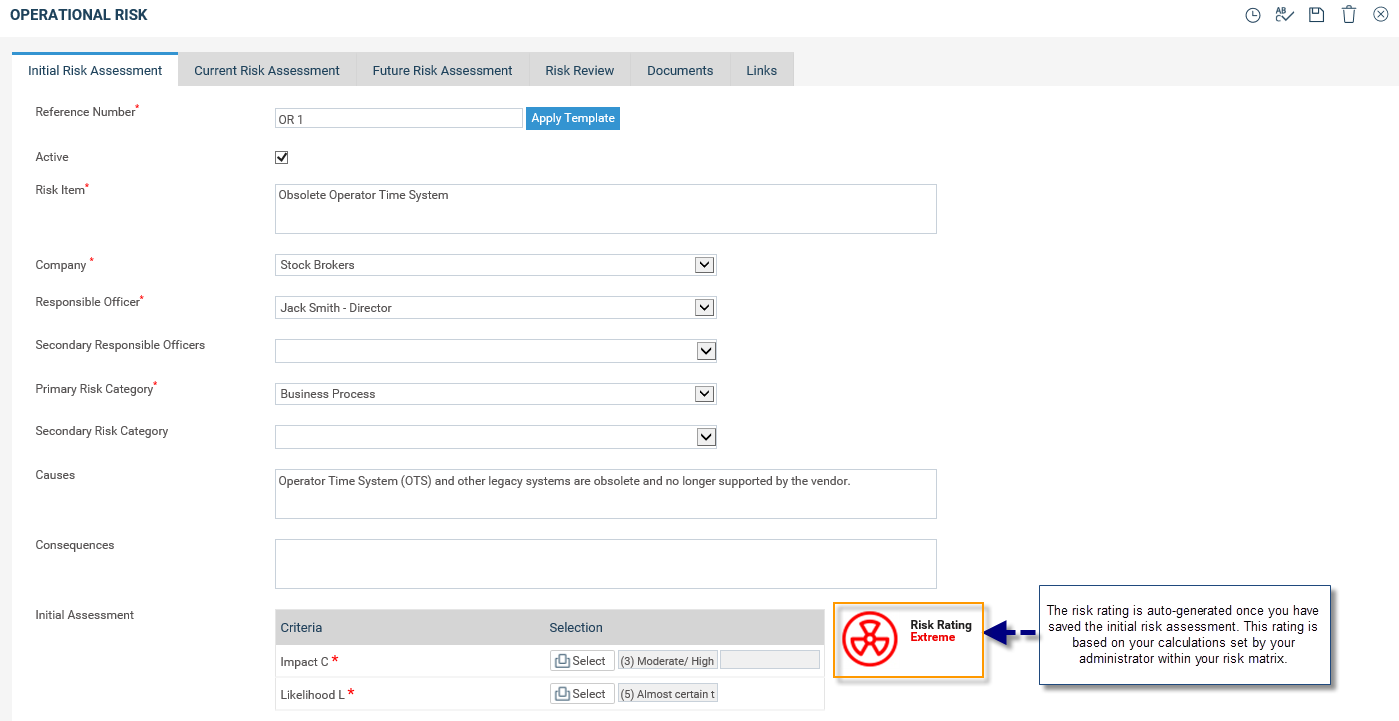
STEP 4:Click 'Save' ![]() icon to save the initial risk assessment.
icon to save the initial risk assessment.
Every risk created will automatically default to ‘Active’ – you can deselect this if required. After saving, an image will appear which shows the Calculated Risk Rating.
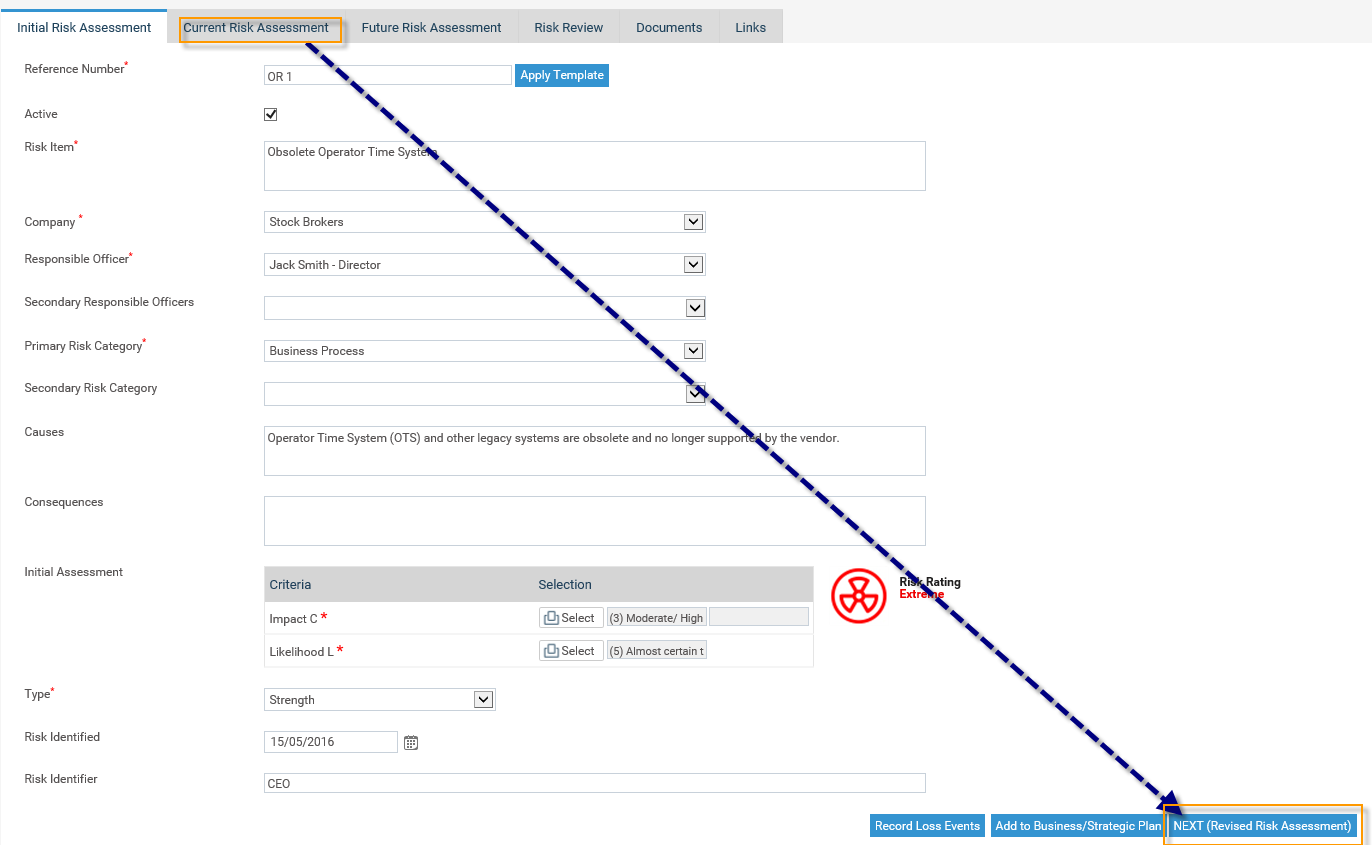
When you have completed entering and saved all the information for your Initial Assessment you can go on to assess the Current Risk by clicking on 'NEXT' ![]() or clicking the 'Current Assessment' tab. Note that these buttons will only be active once you have saved the Initial Risk Assessment.
or clicking the 'Current Assessment' tab. Note that these buttons will only be active once you have saved the Initial Risk Assessment.
Initial Assessments for all three types of risks are conducted in the same way.
Copyright © 2014-2015 CAMMS Online Help. All rights reserved.
Last revised: September 23, 2018

